Tuesday, February 11, 2014
Although the game has been withdrawn from sale on Apple App Store and Google Play, many people still play it on their phones. This post doesn't tell you how to play this game and gain high score but how to get rid of ads as I guess some people may feel bothersome because the ads keep displaying while playing.
You can remove the ads easily by turning on "Airplane mode" before playing. Without Internet connection, the ads won't appear anymore and you can enjoy the game more :-) In the case you still see the ads in Airplane mode, restart the app.
Tuesday, February 11, 2014 by Unknown · 0
Thursday, January 10, 2013

Nandroid backup is a backup of a running ROM (OS, configurations, personal data, apps) of an Android device. Nandroid backup is very important for users who update ROM frequently.
Usually, to create a Nandroid backup, you need to use ClockWorkMod or TWRP Recovery. However, this approach is rather time consuming. Now with Orange Backup, you can create a Nandroid backup and save it to cloud storage easily.
This app only runs with rooted devices having busybox v1.2 or later installed. With this app you can create Nandroid backup on the fly and you don't need to restart you devices. The progress is simple with clear instructions. You can also set back-up schedule with this app. In addition to Nandroid backup, the app also provides some other features: uninstall or freeze apps and talk killer.


You can download Orange Backup for free on Play Store:

Thursday, January 10, 2013 by Unknown · 2
Rooting is an important step to gain root access to your Android smartphones with super-user ability. You then can modify files in system folders, install custom ROMs or customise your devices. This post shows you how to root your Android devices with SuperOneClick.
Steps:
1) Download the latest version of SuperOneClick and save to your computer.
2) Connect your smartphone to your computer via USB port, turn on "USB Debugging Mode" (in setting) and unmount SD card.
3) Install SuperOneClick on your computer. If you have Samsung devices, choose "Samsung captivate" tab. Choose "Universal" tab for other devices.
4) Click Root and wait. The progress may take several minutes to complete.
5) Finally, restart your device.
Tutorial video
List of devices that can be rooted by SuperOneClick
Acer Liquid MetalDell Streak
HTC Magic (Sapphire) 32B
HTC MyTouch 3G
HTC Bee
LG Ally
LG G2X
Motorola Atrix 4G
Motorola Charm
Motorola Cliq
Motorola Droid
Motorola Flipside
Motorola Flipout
Motorola Milestone
Motorola Pro +
Nexus One
Samsung Captivate
Samsung Galaxy 551 (GT-I5510)
Samsung Galaxy Portal/Spica I5700
Samsung Galaxy S 4G
Samsung Galaxy S I9000
Samsung Galaxy S SCH-I500
Samsung Galaxy Tab
Samsung Galaxy 5
Samsung Transform M920
Samsung Vibrant
Sony Ericsson Xperia X8
Sony Ericsson Xperia X10
Sony Xperia Arc
Sprint Hero
Telus Fascinate
Toshiba Folio 100
by Unknown · 2
Saturday, May 19, 2012
After some simple steps, you can use Office 365 services (email, calendar, SharePoint Team Sites, Unified Communication US, …) from your iPhone.

Your can find email settings of Office 365 in Outlook > Outlook Web App > Options > See All Options > Account > My Account > Settings for POP, IMAP, and SMTP… These settings are important to connect your iPhone to Office 365. You can also change security settings, such as pin lock, mobile security, encryption and remote wipe, in Mail > Option > My Organization.
The Microsoft Exchange ActiveSync in iOS which is used to push email, calendar and contacts can be used to connect iPhone to Office 365 and to sync calendar, email and contacts between iPhone and Office 365.

First, in iPhone, go to Settings > Mail, Contacts, Calendars > Add Account. Choose Microsoft Exchange in the next screen and, then, input your email, name and password. The Domain box is left blank.

Next, iPhone with get necessary server information from Exchange Online server. If it fails to retrieve this information, you need to input server information of Exchange Server which can be found in your Office 365 Account page manually. Finally, you can choose which contents you want to sync with Office 365.
Saturday, May 19, 2012 by Unknown · 2
Wednesday, December 28, 2011

Update: you can find a simpler way to archive this goal at Easy method to convert APK (Android) to BAR (Playbook)
This post shows you 8 steps to convert an Android app (.apk) to Playbook app (.bar).
Step 0 : download file apk2bar-HaTaX.zip here
Unzip this file into apk2bar folder. This folder will contain:+ apk2bar-HaTaX.bat –> convert .apk file to .bar file
+ signbar-HaTaX.bat –> used to sign .bar file
+ bin folder –> tools to get *.p12
Step 1: (download Android SDK)
Download Android SDK at http://developer.android.com/sdk/index.htmlStep 2: ( Install Android SDK)
Setup Android SDK and remember its path. Run SDK Manager. Click SDK platform in Android 2.3.3 (API10) as follows
Step 3: ( Edit path in apk2bar-HaTaX.bat)
Using notepad to edit file apk2bar-HaTaX.bat to change the path "ANDROIDSDK=" to Android SDK installed in step 2.
Note: remove “\” after android-sdk
Step 4 : (Testing) convert APK –> BAR
This step tests above steps. If you drag file *.APK into file apk2bar-HaTaX.bat and obtain file *.bar without errors, you have done correctly.Step 5 : (Register to receive file *.csj (not *.p12))
Go to website :https://www.blackberry.com/SignedKeys/ to register to receive file and go to https://www.blackberry.com/SignedKeys/ to register another file.Note: in the input PIN part, you can input any characters but you must remember it.
After registering, you may need to wait about 2 hours to receive 2 files *.csj.
- First file client-PBDT-xxxxxxxx.csj (x: client number)
- Second file client-RDK-xxxxxxxx.csj (x: client number)
Step 6 : get file *.p12
Step 6.1 : Open cmd.exe and change to \apk2bar\bin (in step 0) and copy files *.csj into this folder
Step 6.2 : In cmd, type:
blackberry-signer -csksetup -cskpass <create_a_password>
If you already had key, an error will occur.
CSK file already exists. Use -cskdelete to delete first
Don’t use command cskdelete to delete unless you forgot pass. If you forgot pass, you can delete CSK file and request new CSJ file from RIM.
Step 6.3 : Next, input
blackberry-signer -register -csjpin <PIN>-cskpass <csk password from step 6.2><CSJ_file>
Note: PIN is the PIN number in Step 5.
In Step 5, we register 2 keys because we will get errors if using only one key.
Step 6.4: Input
blackberry-keytool -genkeypair -keystore -storepass –dname "cn=" -alias author
Step 7: Config file signbar-HaTax.bat
Using notepad to edit file signbar-HaTaX.bat. Only edit the first part of this file.

SET DEVCERTFILE : the path to *.p12 file created in Step 6.4.
SET DEVCertPASS : pass to protect file *.p12 created in Step 6.4
SET CSKPASS : pass CSK created in step 6.4.
Step 8 : sign file bar
Step 8.1 : Drag file *.apk into file apk2bar-HaTaX.bat to create file *.BARStep 8.2 : Drag *.bar created in Step 8.1 to file signbar-HaTaX.bat to sign file *.bar.
Done!
(ref: tinhte.vn)
Wednesday, December 28, 2011 by Unknown · 7
8 Best Android tablets
2011 is a memorable year of Android tablets since Google released their Honeycomb Android OS.
1. Amazon Kindle Fire (199 USD)

Kindle Fire has multi-touch IPS technology screen (1024x600) which can display 16m colors. It is covered by Gorilla Glass. The best thing of this tablet is its low price. However, Kindle Fire doesn’t have 3G and cameras which are available on most of tablets.
2. Acer Iconia Tab A100 (329 USD - 8GB and 349 USD - 16GB)
![]()
This 7” tablet can run well with more than 200000 apps and is powered by Android 3.2 Honeycomb. It has awesome hardware specification: NVIDIA Tegra dual-core 1GH CPU, 5MP camera with auto focus and flash, Bluetooth 2.1.
3. Asus Eee Pad Transformer Prime (499 USD - 32GB; 599 USD - 64GB)

This is the first tablet powered by NVIDIA Tegra 3 quad-core CPU. It may be the best Android tablet that you can find.
4. Barnes & Noble Nook Tablet (249 USD - 16GB)
Barnes & Noble Nook Tablet is a good tablet for reading books and magazines but not good for entertainment. It has 1024x600 wide angle 7” screen, OMAP4 1GHz CPU, and 1GB RAM.
5. Asus Eee Pad Transformer TF101 (399 USD - 16GB and 499 USD - 32GB)

The most wonderful feature of this tablet is its keyboard. It is the tablet of the year.
6. Lenovo IdeaPad Tablet K1 (499,99 USD - 32GB)

This tablet provides you good experience with Android Honeycomb OS and awesome interface.
7. Samsung Galaxy Tab 7.0 Plus (~$600)
It is the upgraded version of Galaxy Tab 7 with slimmer design and stronger hardware. Now this tablet can be used as a mobile phone.
8. Samsung Galaxy Tab 8.9 (~$600 - 16GB)

This tablet is very thin and light. However, this model doesn’t contain many apps designed for tablets.
10 worst Android tablets
1. Pandigital SuperNova
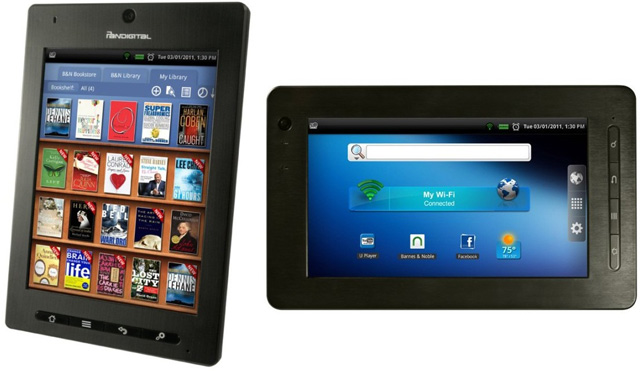
This tablet is light and easy to hold. However, it has a bad screen with narrow view angle. It cannot access to Android Market and is covered by cheap plastic. It looks like a kid toy!
2. Velocity Micro Cruz T301
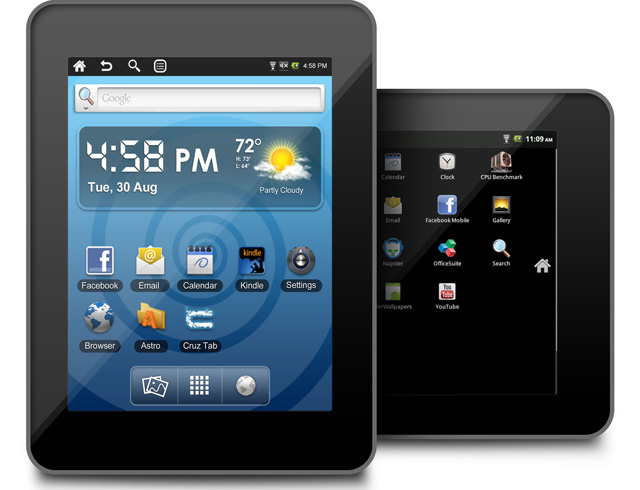
This tablet runs Android 2.2 and has 7” screen. The screen and design are not good and it doesn’t have many apps. This tablet is only good for checking mail, surfing web but not for reading e-books and playing games because the battery life is short.
3. ViewSonic ViewPad 10
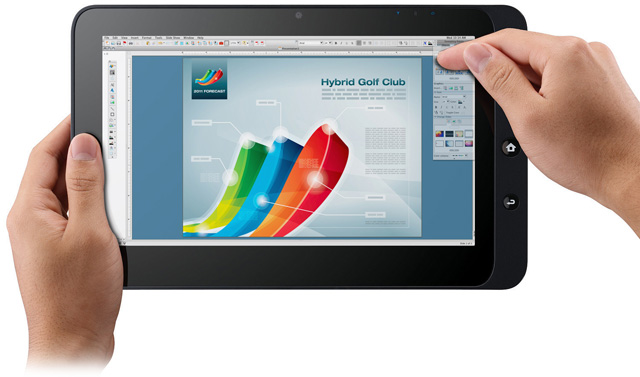
This tablet can run Windows 7 and Android (2.2). It cannot access to Android Market. It has several interface and connection problems.
4. Archos 80 G9
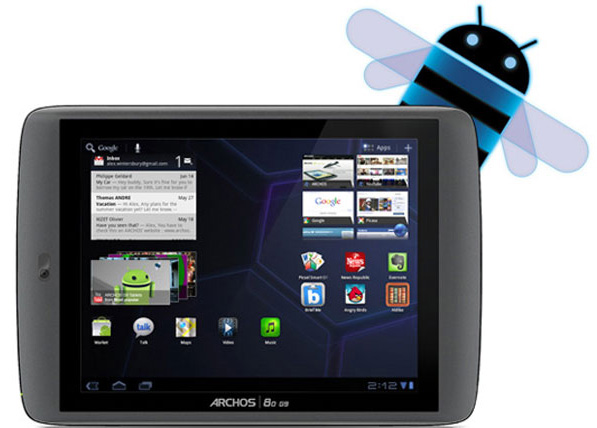
It can capture video 1080p. However, it is bulky and not easy to hold. The design is bad and the locations of buttons are not good. The quality of camera is also very bad.
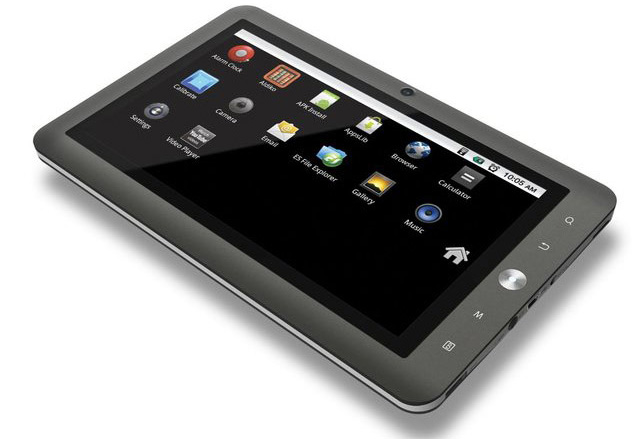
5. Coby Kyros
This low-cost tablet runs Android 2.2, supports HDME, and has microSD slot. However, the quality of camera and touch screen is not good. This tablet is ugly, has short battery life, and doesn’t support Adobe Flash and Google apps.
6. Maylong M-150
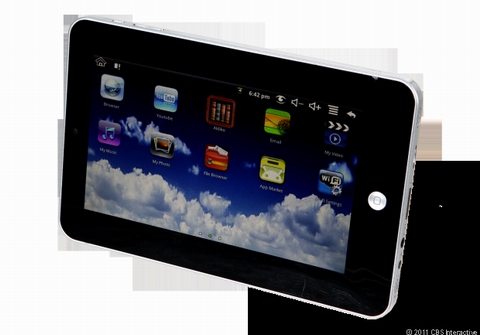
Maylong M-150 is one of the cheapest tablets on market. However, it’s not good at all. It has bad screen, weak battery, and low performance. You will feel regret if you buy it.
7. Fusion Garage Grid10
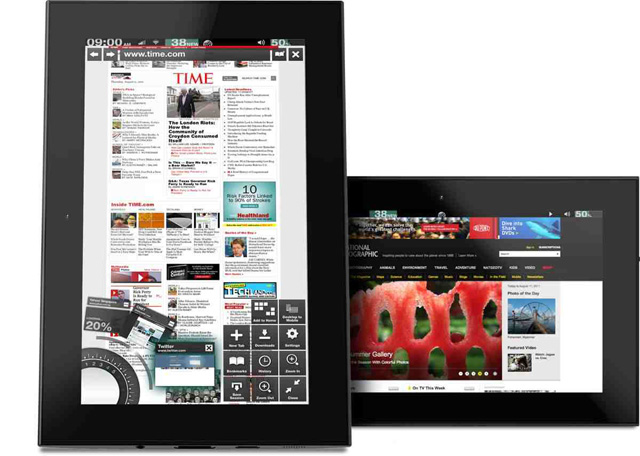
Fusion Garage Grid10 has rather good design and light weight. It has only one interface and weak battery.
8. ViewSonic G Tablet
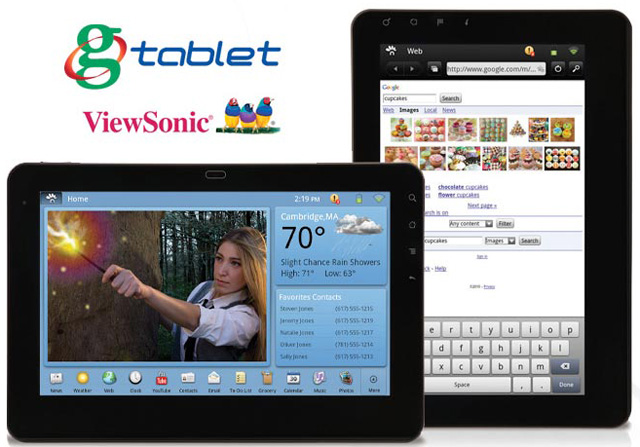
It is the only one 10” low-cost tablet. It doesn’t have Google apps and Android Market. Other apps are not good either.
9. Archos 101 G9 (8GB)
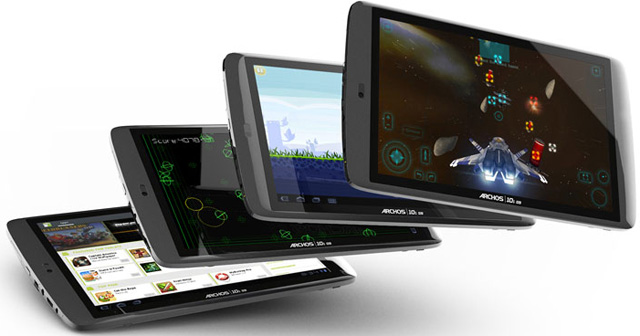
It’s very bulky. The quality of its camera is bad and the buttons are located in bad places.
10. Velocity Micro Cruz T408 and T410
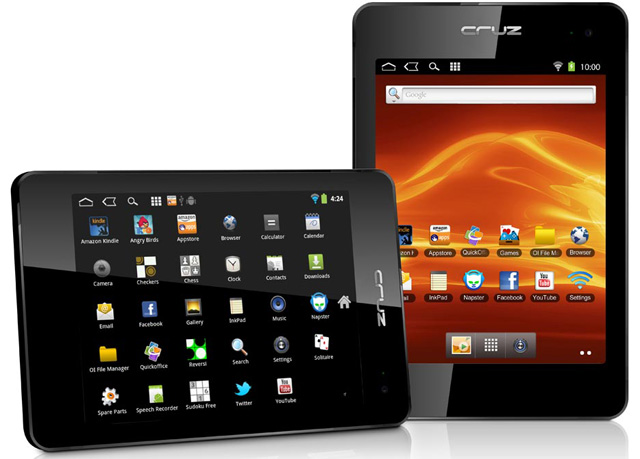
Before Kindle Fire, it is one of the best Android tablet for 200$. Now, it’s not worth to buy it anymore.
by Unknown · 3
Tuesday, December 20, 2011

Now you can upgrade your Nook Tablet to the latest version 1.41. After upgrading, you will lost root. Without rooting, you can only download apps from B&N store. If you don’t consider about rooting, just go ahead to 1.41. Otherwise, you can stay at 1.40.
How to down to 1.40 if you already upgraded to 1.41
1. Turn Nook Tablet off and remove the microSD card
2. Download file acclaim_update.zip, unzip and copy it to microSD
3. Insert this microSD to Nook Tablet and turn your Nook Tablet on
4. Your device will automatically install 1.40
How to lock the automatic update function
1. Install Root Explorer and SQLite Editor (you can find from Market)
2. Run Root Explorer and browse to file devicemanager.db in folder “/data/data/com.bn.devicemanager/databases/devicemanager.db”
3. Open file with SQLite Editor
4. Choose “registry” and find the line “com.bn.device.fota.mode”
5. Find “value” column. Now the value is “auto”
6. Press and hold to the “auto” to display the context menu, then choose “Actions”
7. Choose “Edit Field” and choose “manual”
8. Choose Save
Tuesday, December 20, 2011 by Unknown · 2
Saturday, December 3, 2011

Windows has several ways to sync with other platforms. You can easily find apps on iOS, Android, Symbian, WebOS, … that can sync data with Windows. For Mac users, it’s not easy to find such solution. Fortunately, now we can use SyncMate of Eltima Software to sync Mac with other platforms:
- Windows
- Android smartphones/tablets.
- iPhone, iPod Touch, iPad, iPod nano, Ipod classic, iPod shuffle…
- Windows Mobile
- BlackBerry (will be supported in near future)
- Nokia S40
- Google, Dropbox
- Sony PSP
- Other devices.
SyncMate helps us sync data that are edited and updated frequently, such as contacts, calendars, to do list, bookmarks, notes, photos, music. You can also use SyncMate to sync folders. There are 2 SyncMate versions: free and paid (~$40). With a free version, you can sync address book, iCal, or reading sms on Windows Mobile/S40.
Set up SyncMate on Mac (host)
After downloading SyncMate, double click on *.dmg file and drag/drop SyncMate icon into Application folder. In the first running time, you can download some plug-ins that sync among devices.

First, we need to add devices/services to SyncMate by clicking on “Add connection”

Then choose platforms that you want to sync to
Now you can choose contents that you want to sync, such as Contacts, iCal, Safari Bookmarks, iPhoto, iTunes & Video, and Folders
The sync process is fast and smooth. You can sync via wifi. However, this program doesn’t show the percentage of the process
Set up SyncMate on other devices (clients)
- Android
You need to download and install SyncMate app for Android. After running this app, input IP address of Android device into the program on Mac.
To see the IP of Android device: go to Setting > Wireless & Network > Wifi setting and find the IP address there.
- iOS, iPad, Sony PSP
Plug cable to them. That’s it.
- Windows Mobile
Similar to Android devices.
- Online services (Google, Dropbox, …)
Input your accounts.
- Windows
you need to download and install plug-in SyncMate for Windows. The password is admin password of your PC. Find your PC IP address by Start > Run and input “cmd” and input command “ipconig /all”
and input this ip address into SyncMate program on Mac
SyncMate on Mac App Store can be found here
(ref:tinhte.vn)
Saturday, December 3, 2011 by Unknown · 0
Tuesday, November 22, 2011

This post collects and shows how to install custom Android 4.0 (ICS) for your smartphones.
How To Install Drew Garen ICS Alpha Build 2 On Nexus S
Note: we will have an official update to ICS from Google. However, if you want to use a Android Open Source Project (AOSP) now, you can install by following steps:
Your Nexus S must be rooted and have ClockworkMod Recovery flashed on it. It must have enough battery juice to last through the process; running out of battery during flashing process may permanently damage your device. Lastly, be sure to take a nandroid backup of your device’s current setup before proceeding to be on the safe side.
Step 1: Download preferred type of Drew Garen ICS Alpha Build 2 for Nexus S to your PC from here. On-screen buttons version comes with the on-screen buttons you see in Galaxy Nexus while the no-button version doesn’t.
Step 2: Transfer .zip file to your Nexus S’ internal storage via USB cable from PC.
Step 3: Boot into ClockworkMod Recovery mode. For this, you must turn off your device. HoldVolume Up + Power button simultaneously until you enter CWM mode.
Step 4: Format /system, /data and /cache from mounts and storage in main menu of ClockworkMod Recovery.
Also be sure to wipe data / factory reset from main menu.
Step 5: Go back to main menu and: install zip from sdcard > choose zip from sdcard > [name of file you transferred to your Nexus S in Step 2]
Step 6: Reboot device from main menu.
The full post can be found here.
How to install Android 4.0 ICS on Galaxy S II and S
Note: the current build (Alpha 7) is an alpha version and it is not stable. It is not suitable for daily use now! We will update the post when we have a stable version.
Your phone must be rooted for this flashing process. Follow our guide on how to root Galaxy S II or look up how to root Galaxy S on Google. You must also flash ClockworkMod Recovery.
Secondly, please ensure that your phone has enough battery to last through the process which doesn’t take more than 5 minutes if you’ve got all the files ready. If your phone does run out of battery during the process, chances are it may get “bricked”.
Lastly, be sure to take a nandroid backup which you can use to restore your previous setup.
With that out of the way, let’s get ICS flashed on our GS/GSII!
Steps to install Android 4.0 Ice Cream Sandwich Alpha ROM on your Samsung Galaxy S2 -:
Step 1: Download the alpha 6 version of the Android 4.0 Ice Cream Sandwich ROM for Samsung Galaxy S2 from here. Transfer this ROM to your phone’s internal memory. Now you can download (Galaxy S II ICS Alpha 7 and Galaxy S ICS Alpha 4)
Step 2: Restart your Samsung Galaxy S2 in Recovery mode. Users can use the Quick Boot app to boot into recovery mode. Alternatively, they can simply switch off their phone, and then press the Volume up + Home + Power button simultaneously to boot into recovery mode.
Step 3: First users need to format their phone’s /data, /cache and /system partition. To format the /data partition select the ‘wipe data/factory reset’ option. Format the /cache partiton by selecting the 'wipe /cache' option.
Format the /system partition by going into ‘mounts and storage’, and then selecting the ‘format /system’ partition option.
Step 4: Now, install the Android 4.0 Ice Cream Sandwich ROM on your handset, by selecting the ‘install zip from SD card’ option, and then navigating and selecting the ICS zip file which you had downloaded and transferred to your handset in step 1.
Step 5: Once the flashing process is done, repeat Step 4 again. You need to flash the ROM twice for it to work properly.
When the ROM is flashed navigate back to the main menu and select the ‘reboot system now’ option. The phone will take quite some time to boot.
Once your phone boots, enjoy Android 4.0 Ice Cream Sandwich on your Samsung Galaxy S2. Keep in mind that since this is an early alpha build, most of the stuffs are not working in this build including modem/baseband, capacitive buttons back lit and camera etc.
The full post is at Knowmydroid and Redmondpie.
How to install Android 4.0.1 ICS on Galaxy Tab
Now you can install Android 4.0.1 Ice Cream Sandwich for Galaxy Tab by following steps:
As with all ROM flashing processes, your device must be rooted and have ClockworkMod Recovery installed. The developers explicitly state that you must be on Android 2.x Gingerbread-based bootloader and have EXT4 file format.
Ensure that it has enough battery to last through the flashing process and please remember to take a nandroid backup of your device from ClockworkMod Recovery so you can revert back to your current, understandably more stable state in case you don’t like the ICS Alpha build.
Lastly, this is an Alpha build so do not expect all things to work out of the box. In its current state, it is not ready to be used as a daily driver. Wait for the betas or the actual stable release from the community for that.
Step 1: Download the latest build of Ice Cream Sandwich for original Galaxy Tab from this thread.
Step 2: Transfer the .zip file to the root directory of your Galaxy Tab.
Step 3: Turn off your Galaxy Tab. Boot into ClockworkMod (CWM) Recovery Mode by holding a specific key combination. This can be found by performing a simple search on your favorite engine.
Step 4: Format /system, /data and /cache from mounts and storage under main menu of CWM.
Step 5: Wipe data / factory reset from main menu.
Step 6: Go back to main menu and choose the .zip file you transferred in step 2 from install zip from sdcard > choose zip from sdcard. Ice Cream Sandwich will now be flashed to your Galaxy Tab.
Step 7: Reboot device from main menu.
If you followed the steps correctly, your Galaxy Tab will boot into an alpha build of Android 4.0.1 Ice Cream Sandwich. Have fun! If you have any issues or queries, visit the original thread on XDA.
Full post can be found here.
Tuesday, November 22, 2011 by Unknown · 5


